Povitica
I found this picture of Povitica and I didn't have a clue what it is so I "googled" it first before making it. Here is what I found:
Povitica or Croatian walnut bread, is a nostalgic favorite of many Eastern Europeans and their descendants. Povitica is rolled yeast bread, somewhat akin to strudel. It is typically served at special occasions, such as the holidays, birthdays and weddings. The versatility of this bread makes it perfect for morning coffee, or as a simple dessert. By some, the process of making povitica is revered as a dying art, made by long gone grandmas and aunts in the “old country.” The sweetened dough is rolled out very thin and flat, and then is slathered with filling. While walnut is the most traditional of the fillings used to make povitica, other choices of fillings include hazelnuts, chocolate, poppy seed, strawberry jam, apples, cherry, pumpkin and cream cheese. After the filling is spread over the dough, it is rolled tightly, into a simple roll and baked, or placed into a loaf pan for a more uniform loaf."
So it looked a little complicated but actually it was quite easy and didn't take that long - maybe 4 hours start to finish. I heard it makes great French toast - if there was any leftovers! It was gone in a day :) Here is the basic recipe and on the side is what I did that was different.
For Yeast to grow...
1/2 tsp sugar
1/4 tsp all-purpose flour
2 tsp warm water
1 1/2 tsp dry yeast (I use SAF Yeast - it's my favourite)
For the Dough...
1/2 cup skim milk (I only had 2%)
3 tbsp sugar
3/4 tsp salt
1 large egg
1 tbsp unsalted butter, melted
2 cups all purpose flour
For the filling...
1 3/4 cup walnuts, measure first, then grind in a food processor (I only had pecans)
(I also added 1 Apple chopped very fine and saute to soften them)
1/4 cup skim milk
1/4 cup unsalted butter, melted
1 egg yolk
1/4 tsp vanilla extract
1/2 cup sugar
1/4 tsp cocoa powder
1/4 tsp cinnamon
For the glaze... ( I just brushed on the egg white and sprinkled a little sugar on it)
1 egg white
1/4 cup sugar
Growing the yeast...
In a small bowl, mix together the yeast ingredients and allow to sit at room temperature for at least 5 minutes. Check to see if your mixture is bubbly, that means your yeast is alive!!!
Making the dough...
In a small saucepan, heat milk to 180 F, remove from the heat and allow to cool to 110 F. In a large bowl, mix milk, sugar and salt until dissolved. Add egg, yeast mixture, melted butter and 1/2 cup flour. Add the remaining flour, 1/4 cup at a time, until the dough comes together. Switch to the dough hook, or knead by hand, and knead for about 5 minutes.
Coat a bowl with cooking spray and add dough, roll the dough around to coat in oil. Cover the bowl with plastic wrap and allow to rise until doubled in size. This should take about 1 hour to 1.5 hours.
Making the filling...
Just before the dough is doubled, grind the walnuts in a food processor and add the remaining ingredients.

Bringing it all together...
Preheat oven to 350 F. Grease an 8- or 9-inch loaf pan with cooking spray and set aside.
(I always use Parchment Paper to line my pans)
Take a clean bed sheet - preferably white so you can make sure there is nothing on it and spread it over your work surface. Lightly coat the sheet with some flour, not too much just a little flour. Add bread and roll out to a circle, about 10x12-inches.

Pour 1/2
tbsp of melted butter onto the dough. Using the backs of your hands, stretch the
dough out until it's super thin. You want to be able to see through it, it's so
thin! Try to make it a rectangular shape. ( I could have made it thinner - I will know for next time)
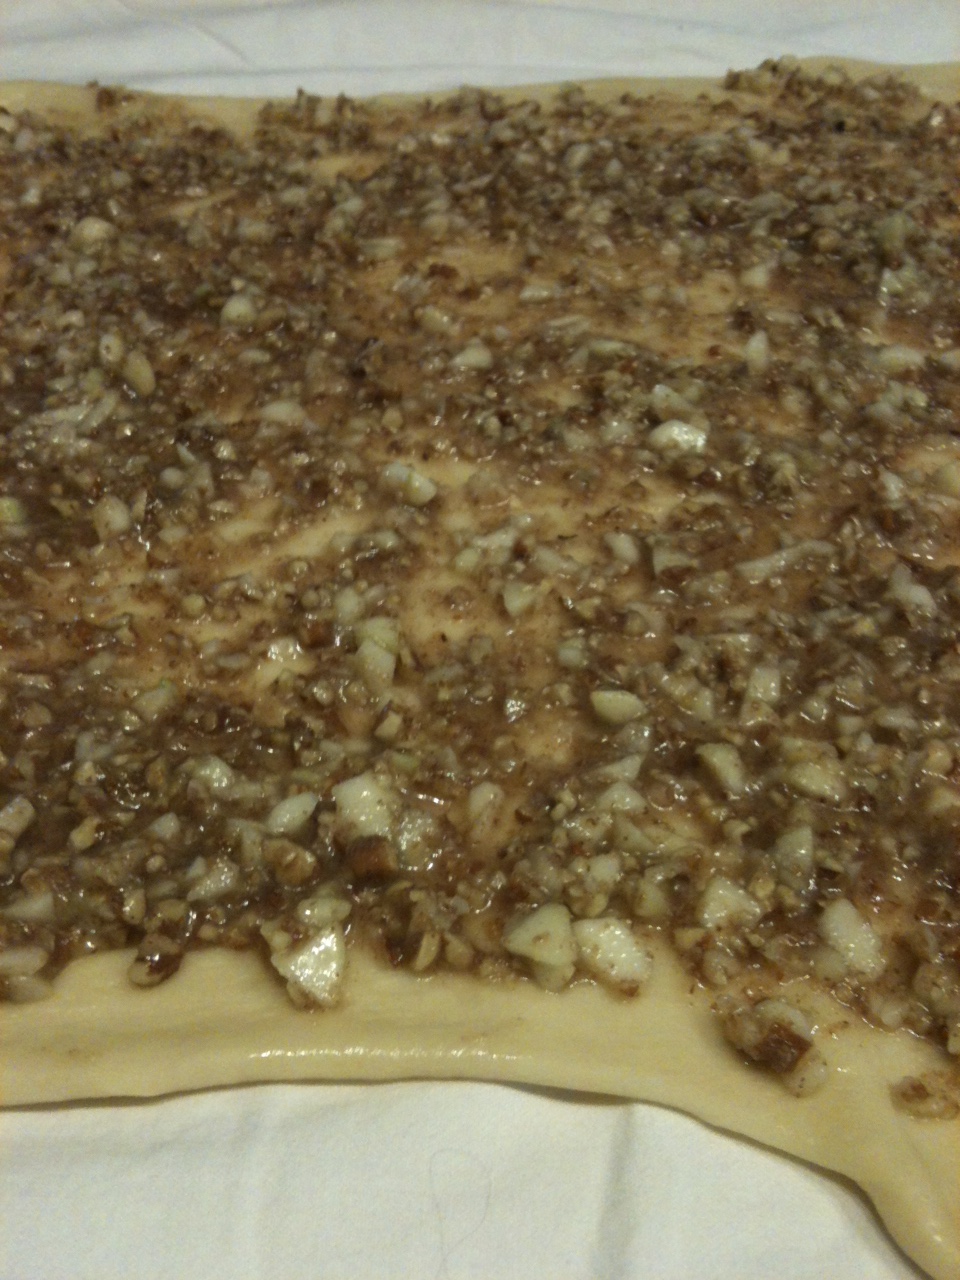
Once it's thin enough, add the prepared topping and spread out to cover the entire dough sheet. Now, roll up the dough. I used the sheet to help. Gently lift up the sheet and the dough should start to roll onto itself. Try to lift evenly across the length of the dough.

Once the dough is rolled, place it in the loaf pan, forming a U shape (two ends will be dangling out of one end). Fold the two ends back onto the dough. Using a pastry brush, coat the loaf with egg white and sprinkle with sugar. Cover the pan with plastic wrap and allow to rise for about 15 minutes. ( mine kind of looks like a swan!)

Remove plastic wrap and place the pan in the oven. Bake for 15 minutes. Lower the temperature to 300 F and continue baking for 30-45 minutes. .

Once baked, remove from the oven and place on a wire rack to cool for 30 minutes. Pop out of the loaf pan and ENJOY!. Look at those swirls! (You can see that I should have made it thinner - but it was very good just this way too!